How To Make Circle Webcam In OBS Studio in 5 minutes!
- - -
This article is also available in: 中文
In this tutorial, we'll show you how to create a circular webcam overlay using OBS Studio in just 5 minutes. 
Prerequisites
- OBS Studio installed
- A webcam
Steps
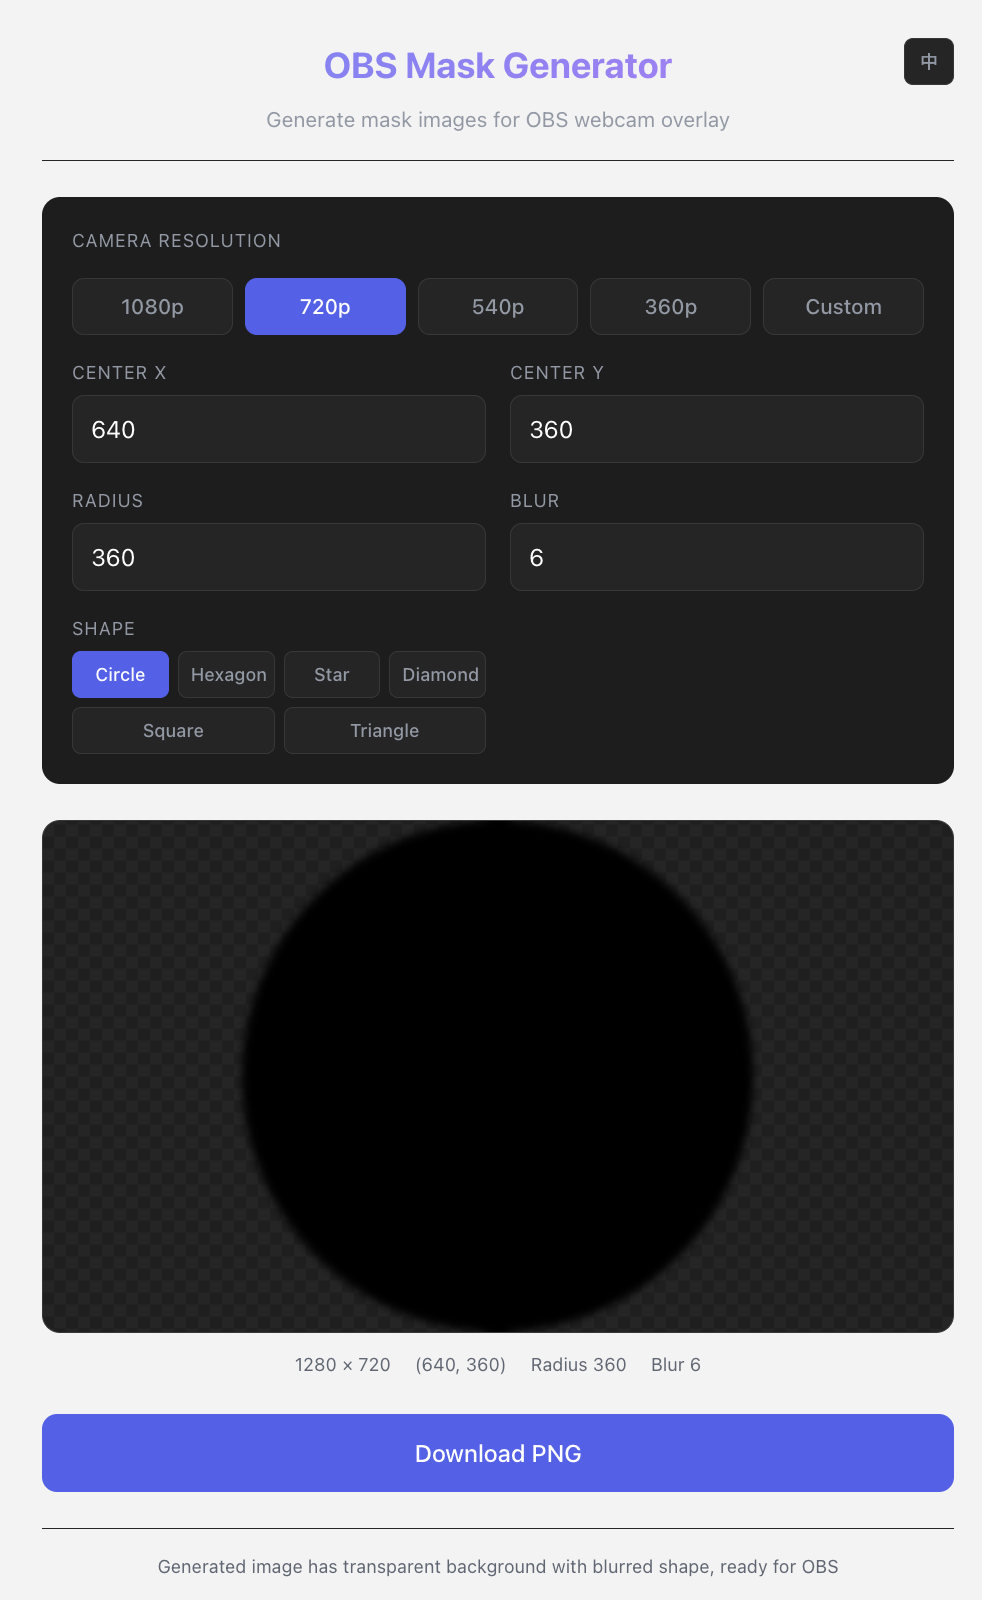
1. Open OBS Mask Generator
- Select your camera resolution or choose Custom — the center position will auto-calculate
- Choose your preferred shape (circle in this case)
- Set the Radius and Blur values
- Download and save the PNG file to your local disk
2. Open OBS Studio
Launch OBS Studio on your computer.
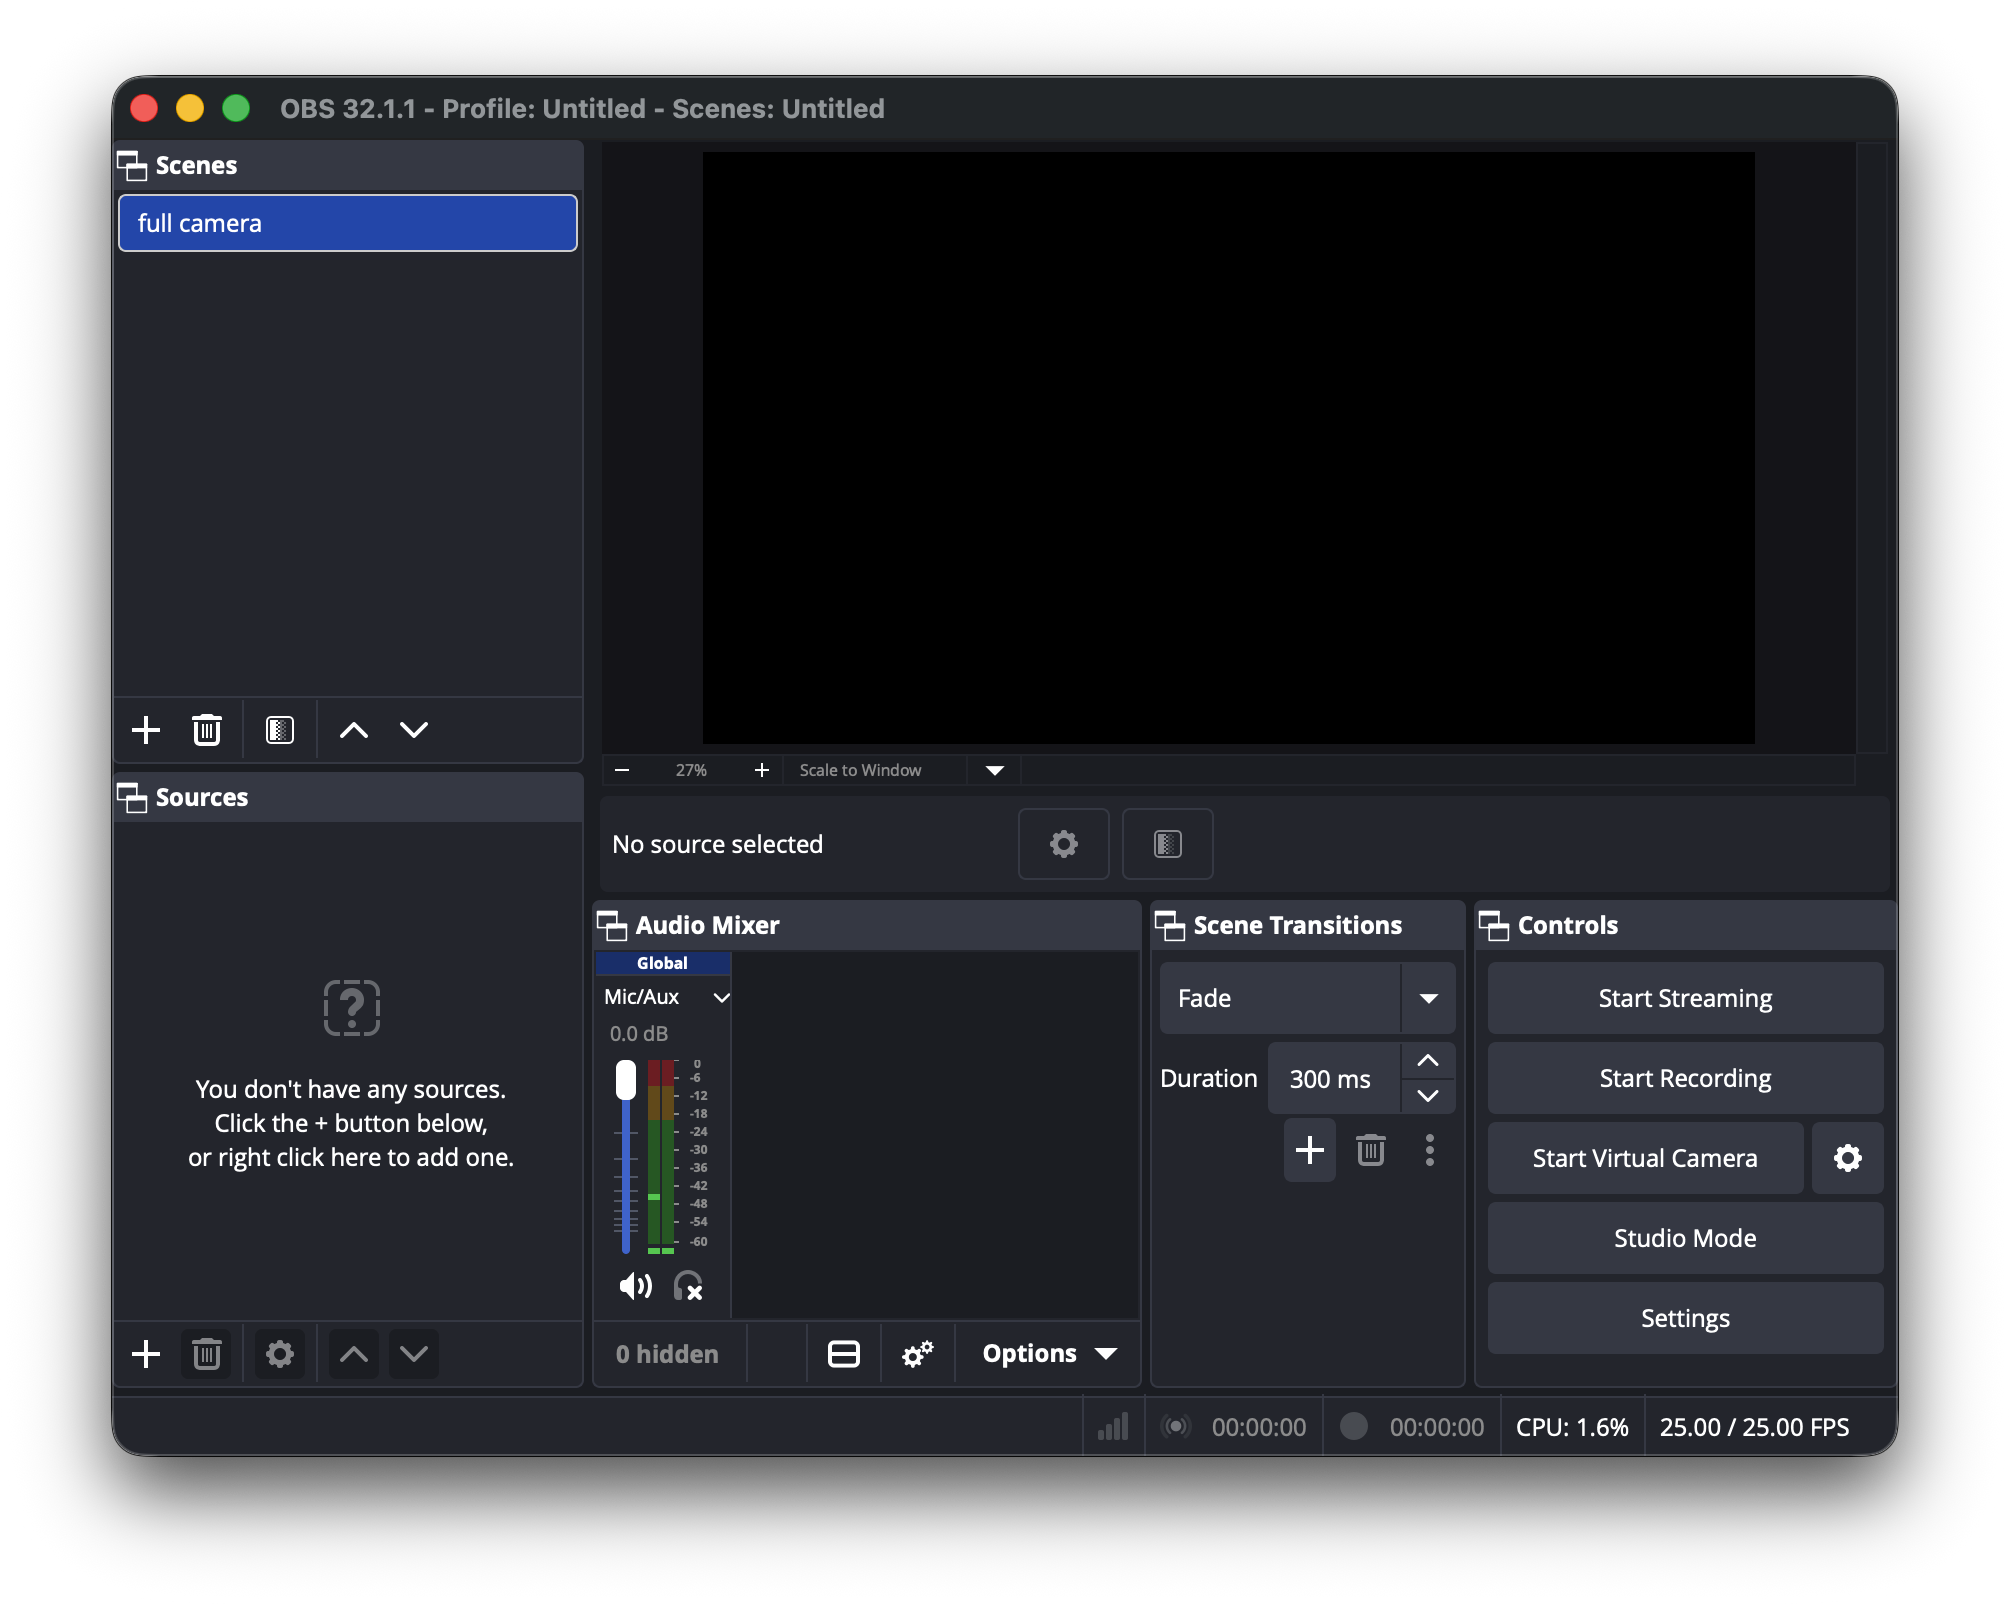
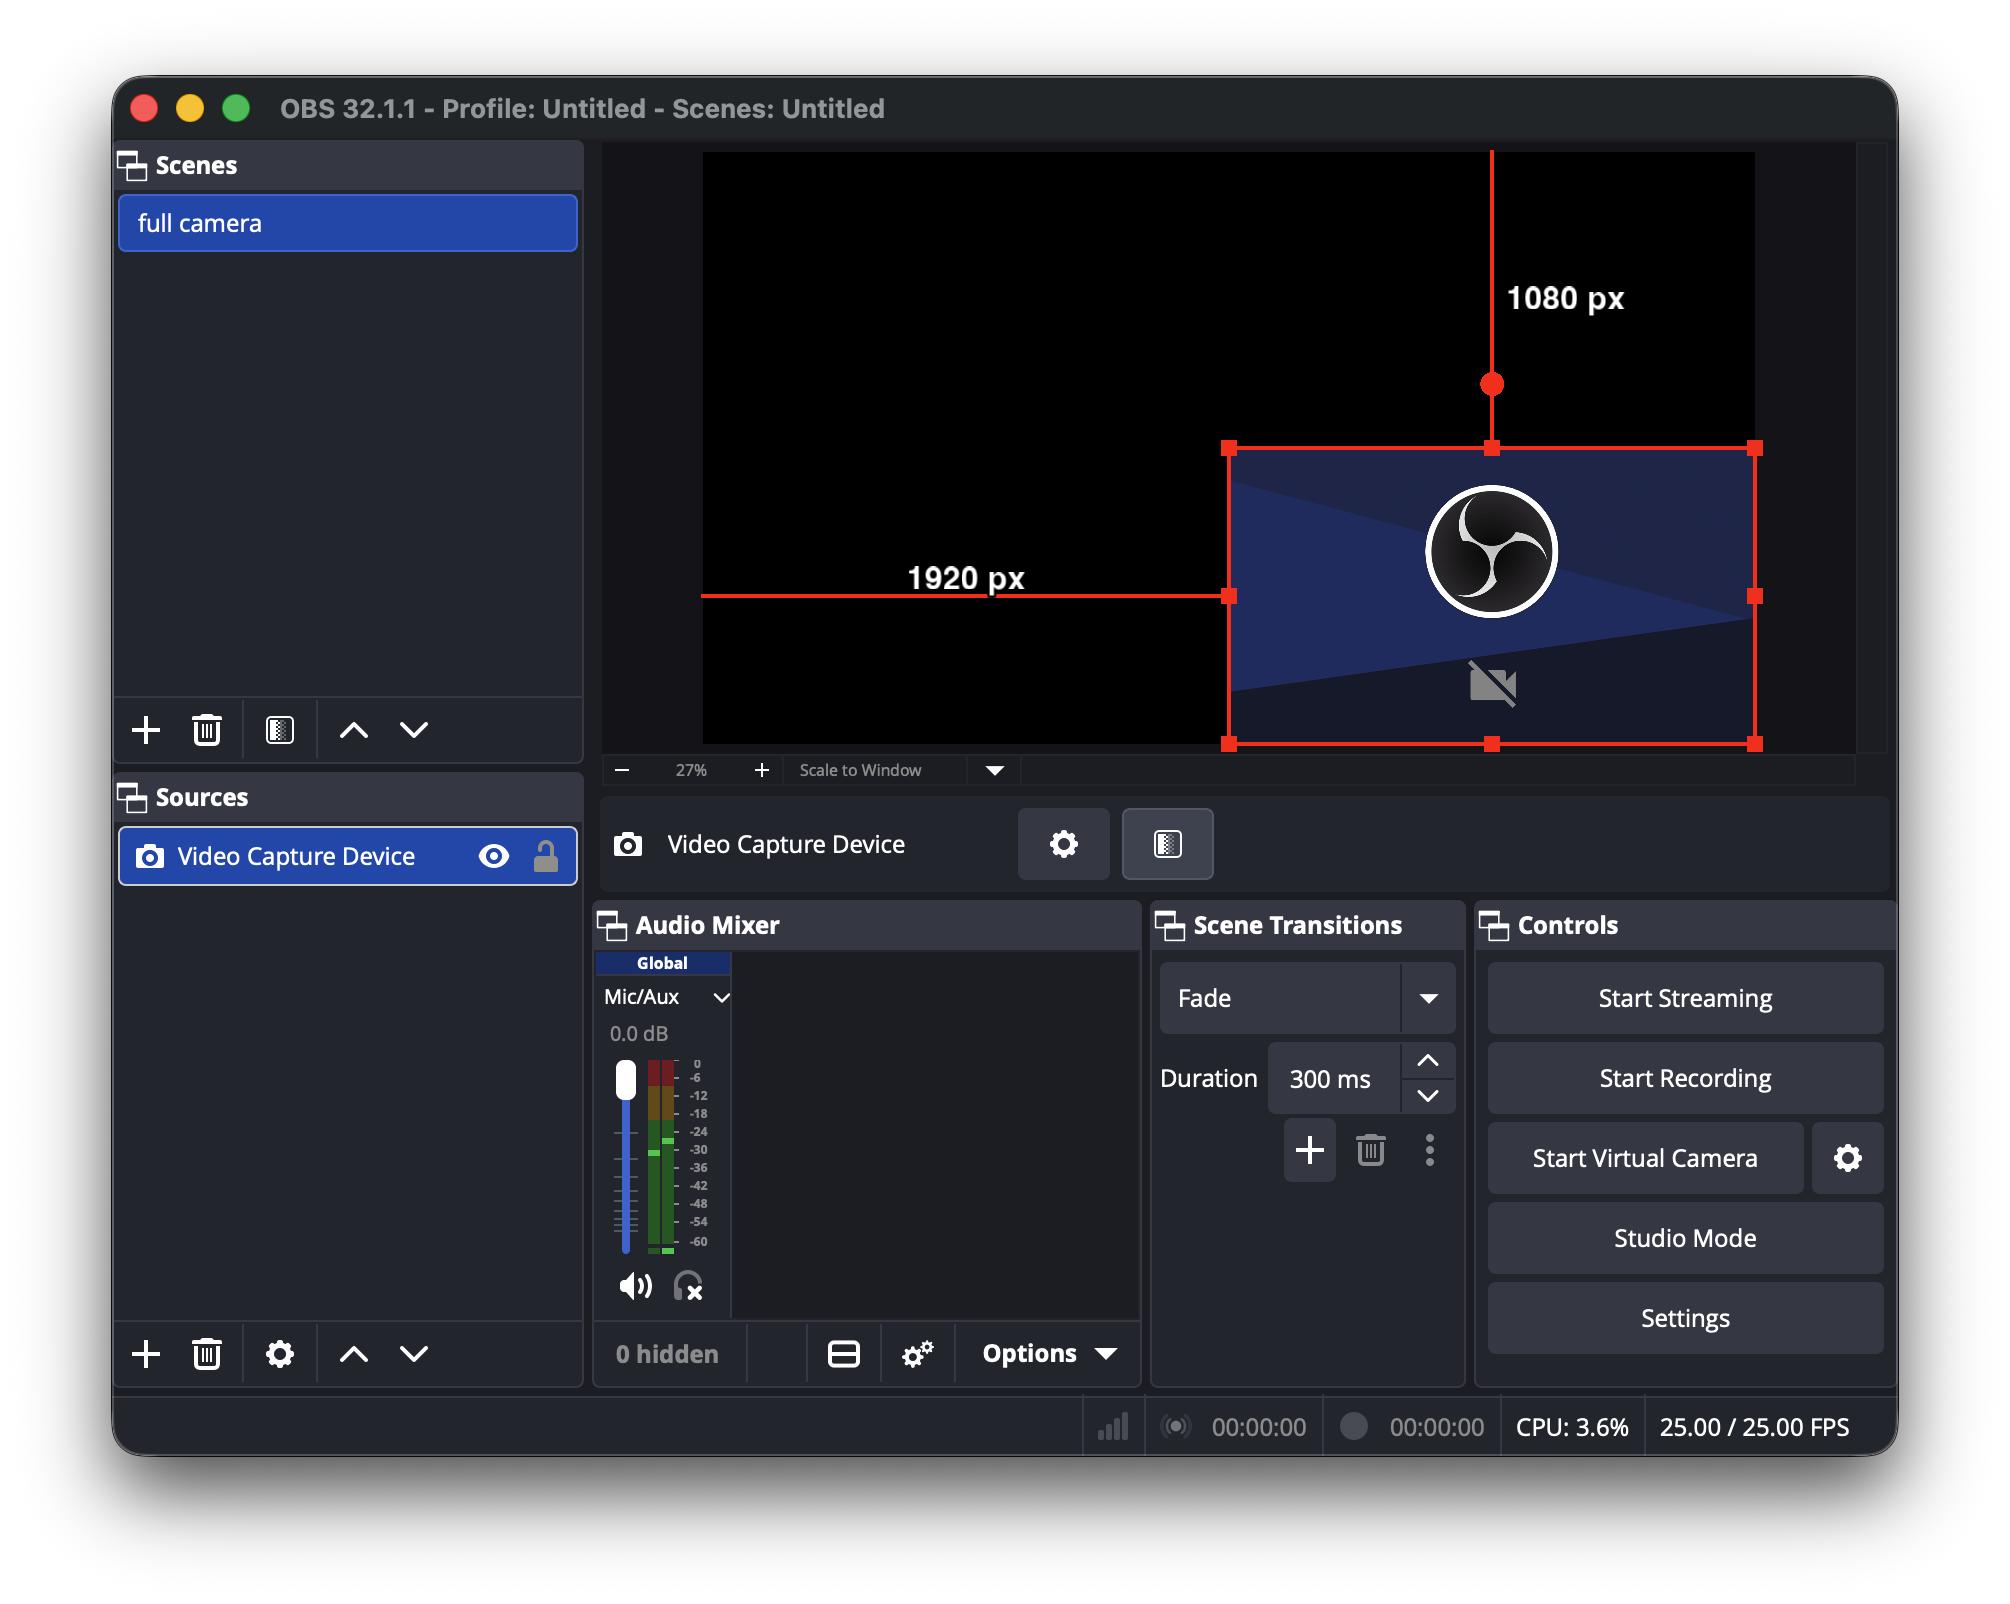
3. Add Your Webcam Source
- In the Sources panel, click the + button
- Select Video Capture Device
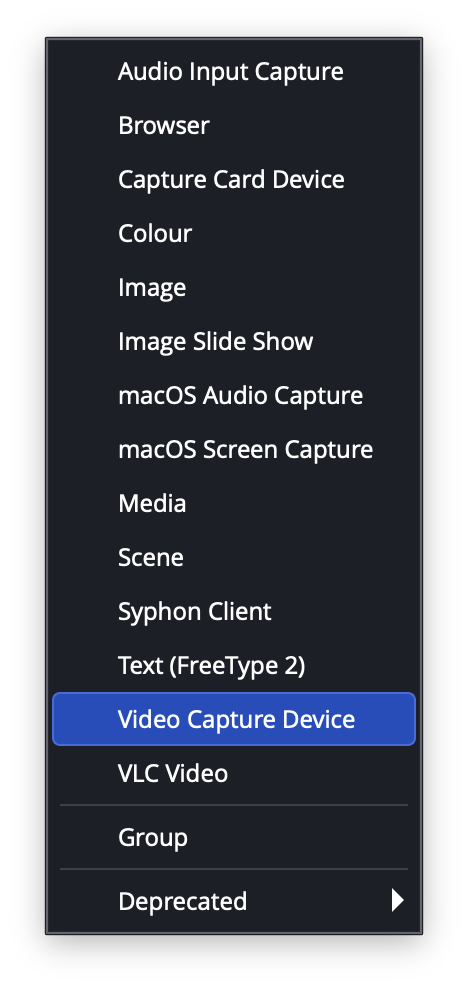
- Choose your webcam from the dropdown
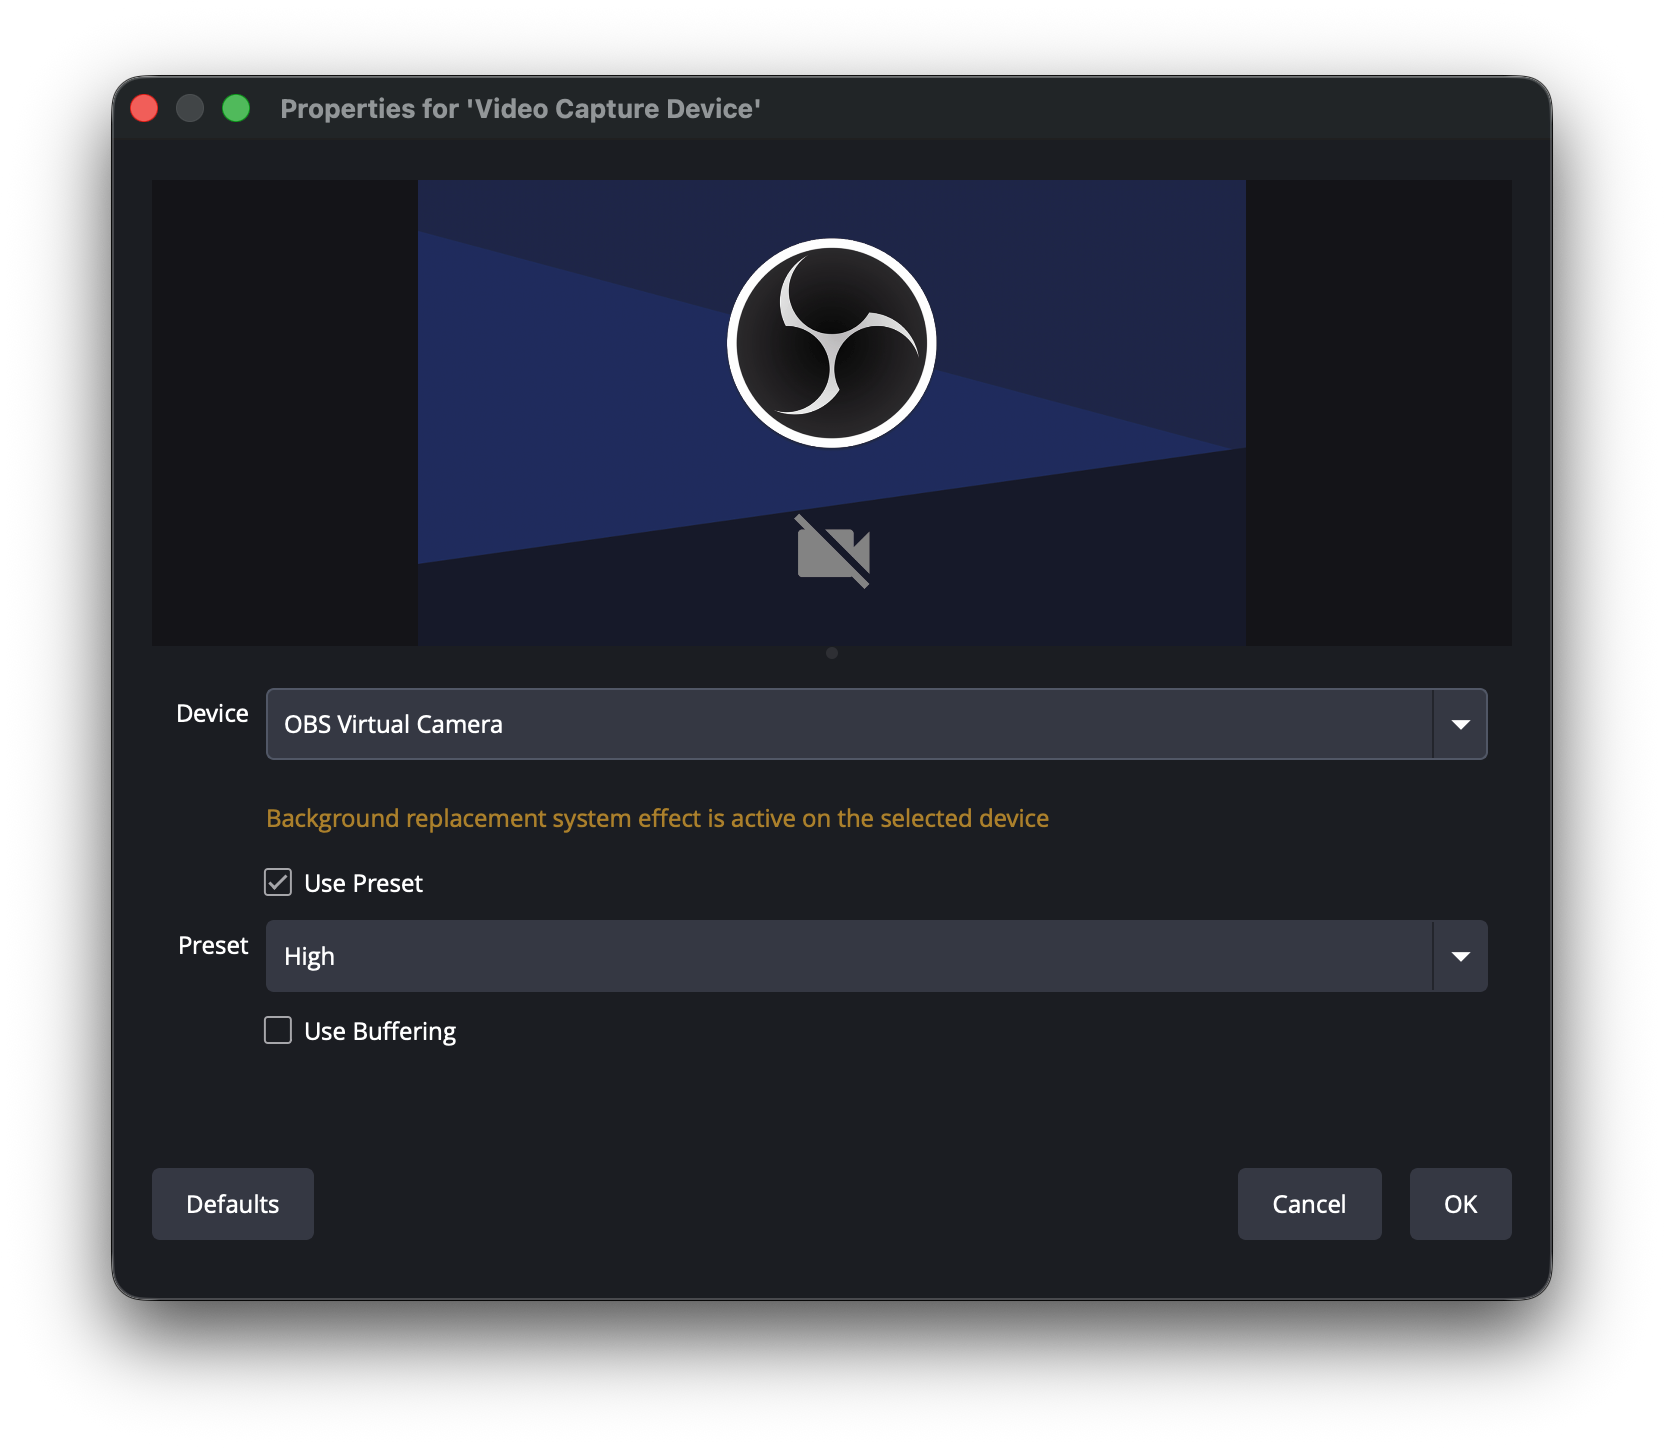
- Click OK
4. Apply the Circular Mask Filter
- Click on your webcam source in the Sources panel
- Click Filters button
- Click the + button and select Image Mask/Blend
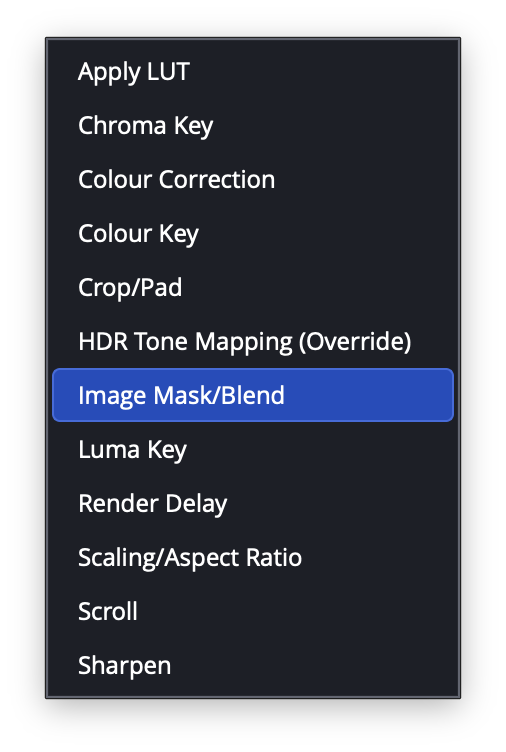
- Set the following values:
- Type: Alpha Mask (Alpha Channel) — Note: The default is Color Channel, change it to Alpha Channel
- Path: Browse to the PNG file you downloaded in Step 1

- Click OK
5. Adjust Position and Size
Drag your webcam preview in the main OBS window to position it. Use the red transform handles to resize.
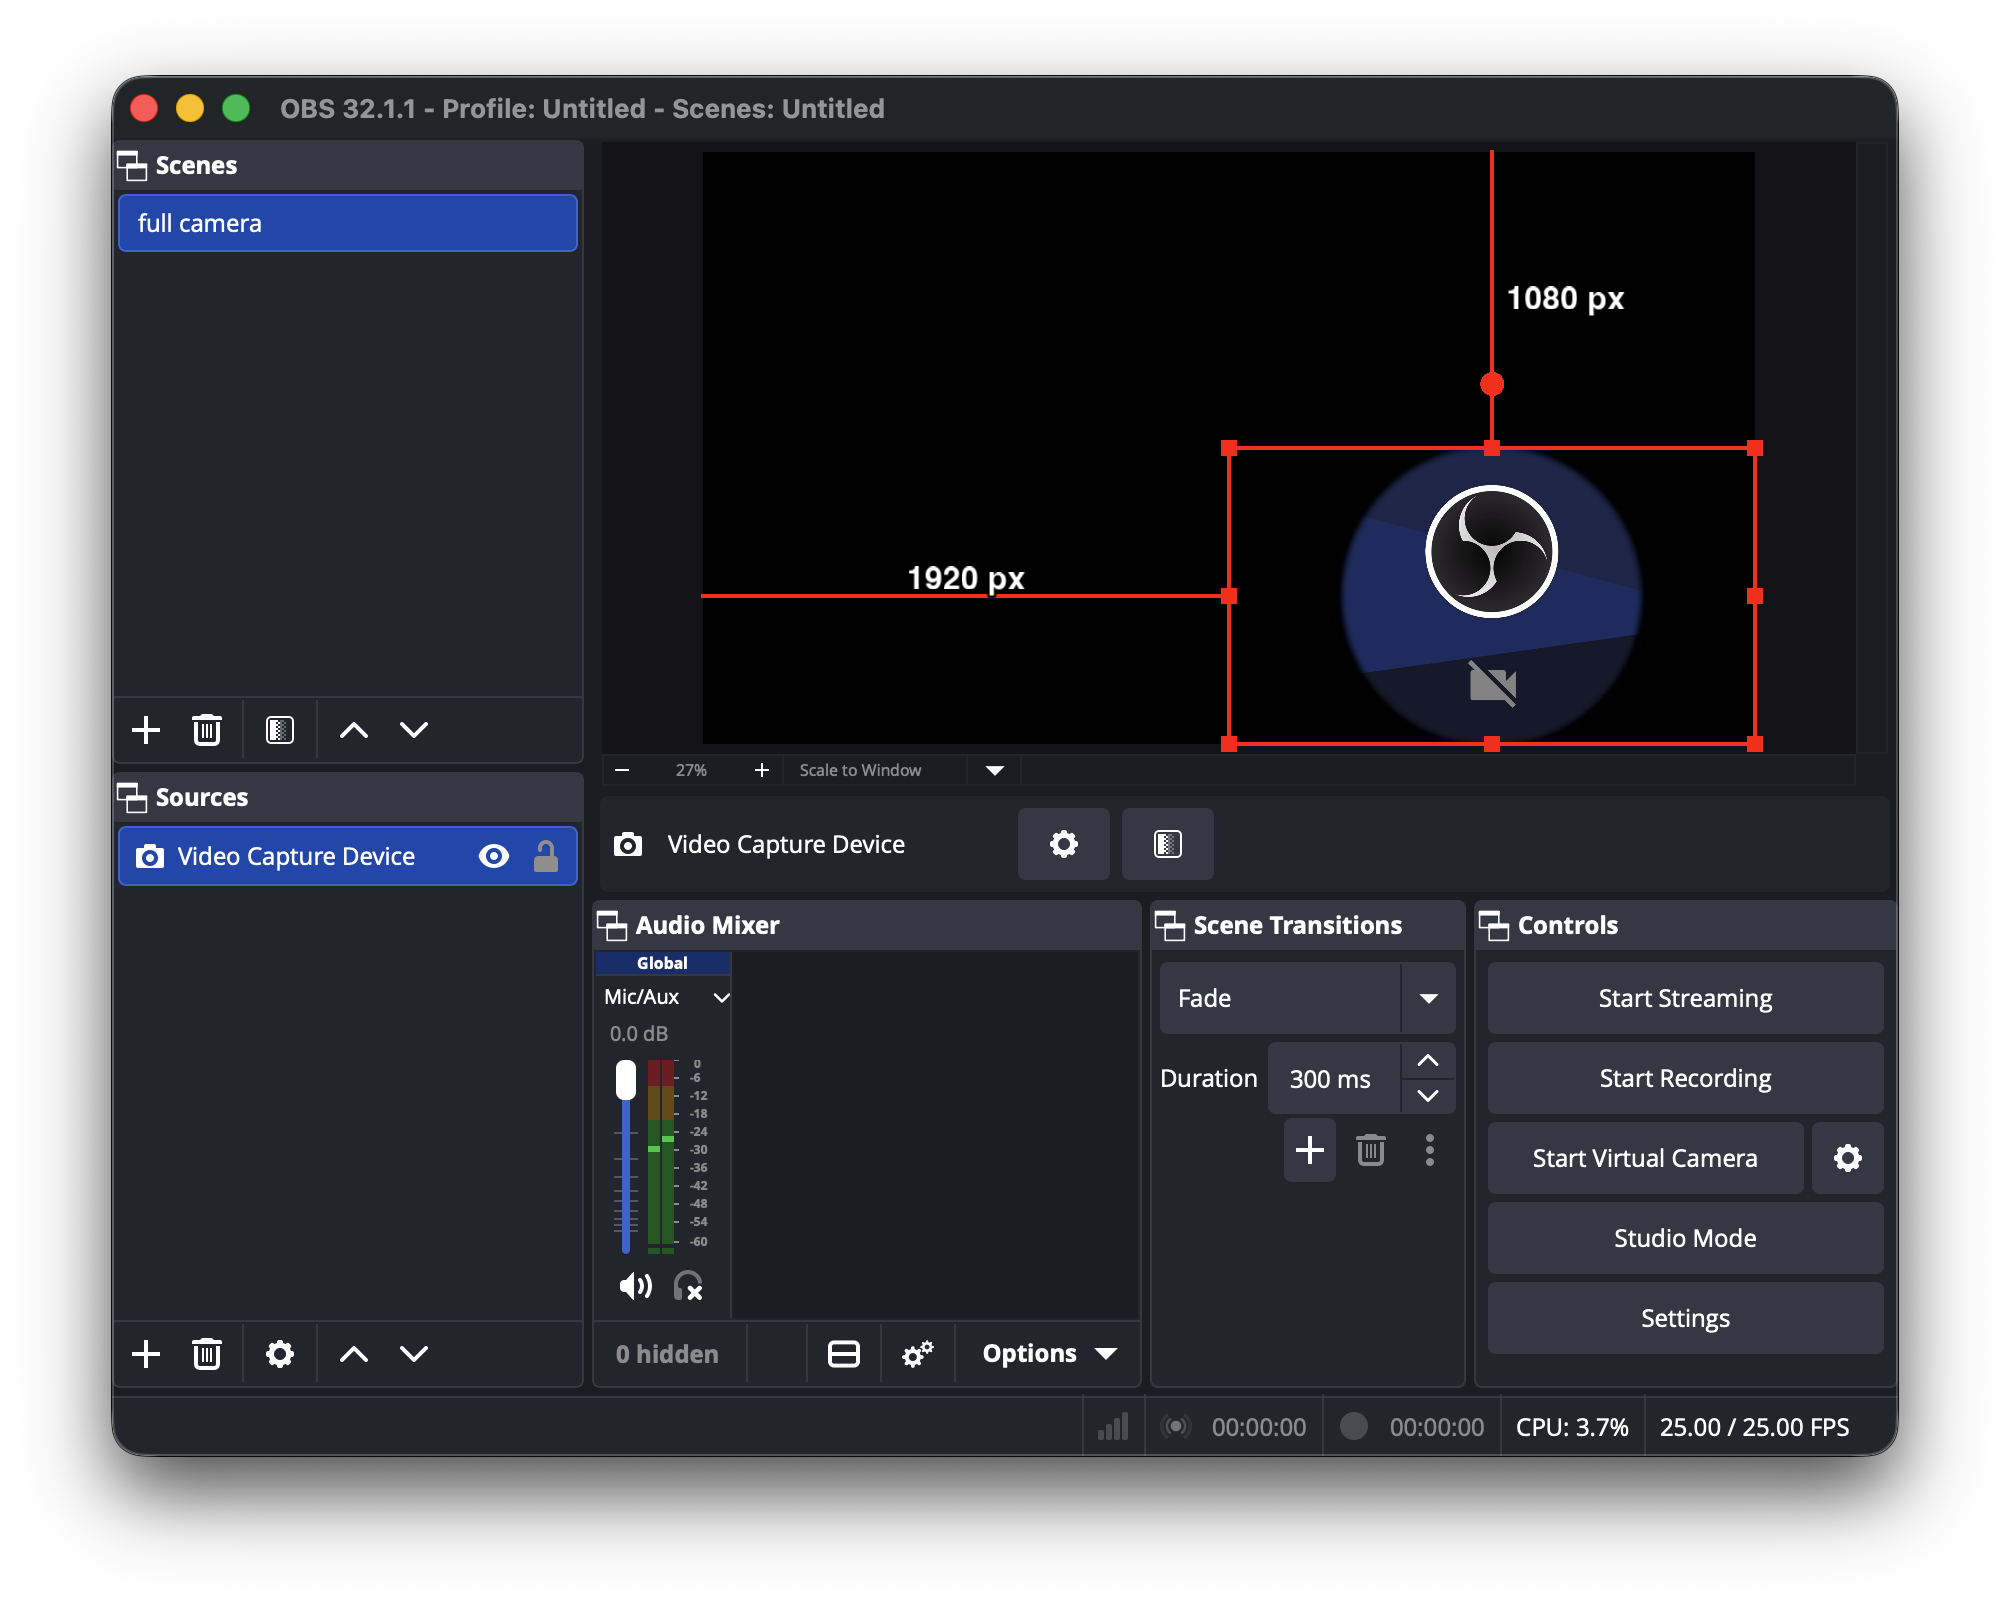
6. Start Streaming!
You're all set! Your circular webcam is ready for your stream.
Pro Tips
- Position: Place your webcam in a corner so it doesn't obstruct your main content
- Shadow: Add a drop shadow filter for better visibility against any background
- Animation: Use OBS Transform tools to add smooth position animations
Stay tuned for the full tutorial with video demonstration...